In March 6th 2006 when we arrived in NYC after 8 months of cruising from Israel, I was still unemployed. I looked for the most cost effective way to have Aliza in NY city area. This was a mooring at Julius Peterson Boat Yard. It was supposed to be a season contract for about $1100 however they saw an opportunity to make more money by the month and charged me $360 per month for their very large 1200 lb service mooring. (Simple calculation will tell you it is almost DOUBLE the charge for the 6 month season) I stayed on this mooring until the last week of August 2006 when I decided to take Aliza out as I started my job at EDS on September 1st. I knew I will not have time for sailing and just have the weekends for work on Aliza.
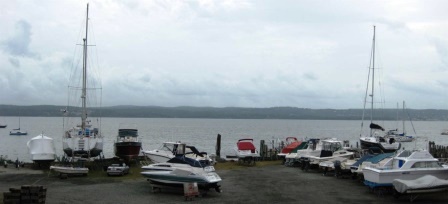 After 5 moths on the service mooring, I take Aliza out on Wednesday. No problems and we are on land safely (Now we are talking $3000 per winter storage.) and I get to sleep good at night as I am working and can afford this expense.
Here is where real luck (Dumb Luck? 😉) comes to play:
On Thursday a fiberglass 50 footer shows up for some service work and is promptly shown to the service mooring… The Captain questions the holding power of the mooring and is told “You see this huge steel yacht here on land? This yacht spent the whole season on this mooring without a problem. You are safe here.” (Famous last words.) On Friday the wind picks up (not a storm, just strong wind) and the new yacht rips the mooring chain and goes sailing on it’s own…. Straight into the Nyack Yacht club mooring field. Striking about 5 yachts and ends up on the Tappan Zee bridge!
Later it was found that the mooring was not inspected for about 3 years and the chain connection to the swivel rusted and gave in. Timing is everything!!! – Lesson learned: Never tie to a mooring you have not inspected yourself! (That one is basically after we ripped a temp day mooring in Hawaii and I read about a BVI yacht that went sailing when the crew had dinner ashore.) I’m glad it was not Aliza who plowed the mooring field as she would surly cause major damage to the yachts. (Not to mention the damage she would do to the bridge 🙂 )
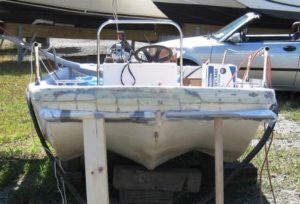
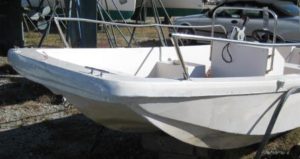
So this ended (on a good note) our stay in the water and started a 2.5 year of working on Aliza on land. Due to the long time I planned to have Aliza out and the size of her (she has quite a wind area as she towers well above all smaller boats in the yard.) I requested that we should put additional support for her a little higher up on the sides. The additional support should stabilize her from side wind gusts that could topple her if we would have Hurricane strength winds. Fortunately we did not have to worry about these kind of winds however the extra support allowed me to sleep better knowing she will not fall over her side and crush a few smaller yachts near her.
Generally the plan was to make sure Aliza is safe (Check all area where raw water can get namely seacock’s, steering shaft dripless, driveshaft dripless.) straighten up all electrical systems, remove rust and restore paint and varnish to all woodwork.
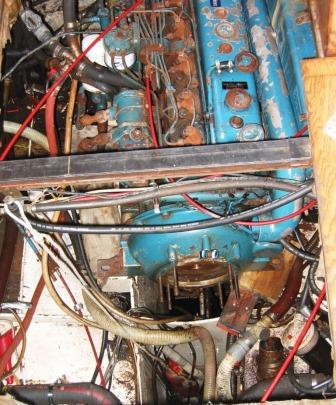
First project was the engine room, removal of transmission and removal of engine so I can repaint the engine mounts, and fix a broken support for the refrigeration compressor and the hydraulic pump that were mounted on the engine. We have discovered that problem on the last trip from Israel however this major repair could not be done in the water as I needed to have the engine removed. This is how it started (This was a one person job so I had to use mechanical help). And the strap I used around the trany is connected to a 1 ton hoist I am operating with one hand while I maneuver the trany around the engine room below.
![]()
Orange straps and 1 Ton hoist connected to the Transmission.
Once the Transmission was secured and moving up and out of the engine room I could manage myself to maneuver it safely and lay it on the Pilothouse floor.
![]()
Still hanging on the hoist and straps before I place it on the floor.
![]()
Transmission on the floor of Aliza’s Pilothouse.
Once the transmission was off the engine I could lift the engine up from its support brackets and remove them for rust removal painting.

First I had to lift the engine off the base so I can remove the support brackets.
After the support brackets were removed it was an easy process to clean and paint


First I had to clean the support mount from rust and old paint.
Then I had to apply a rust converter to stop the oxidization before I paint with the primer base.


Apply rust converter coat.
Next was the primer paint.

Finally it is the “Perkins Blue” paint
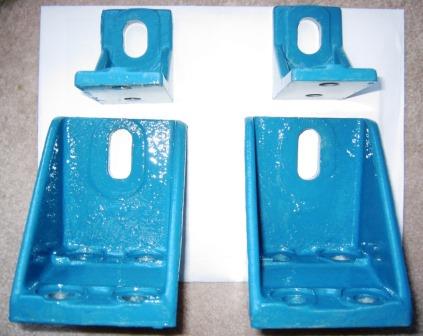
And finally the engine mounts go back on the engine and I had to install the engine and align the propeller shaft. Note the elongated holes on the bottom of the brackets. They allow me to adjust the final placing of the engine so there will be perfect alignment with the Propeller shaft.

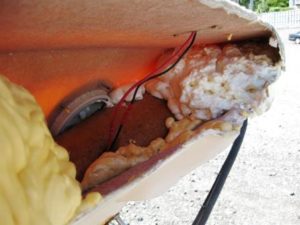
As I mentioned before, the real reason for the engine work was not only to paint the support. It was a broken piece of SS bracket that had 2 major parts. The Refrigeration Compressor on one side and the Hydraulic Windlass Pump on the other side. This is the Hydraulic side (Engine Starboard) as I put it in place before I install the engine mount.

Next photo is the Hydraulic side (Engine Starboard) as I put it in place before I install the blue engine mount which goes on top of the 4 screws that are shown here.
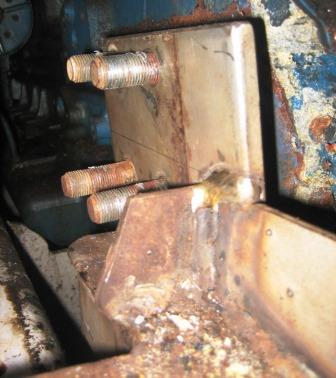

The extra welding is the area of re-enforcement which I added to the bracket.
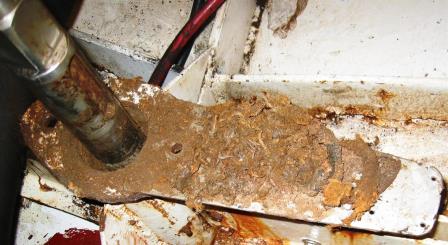
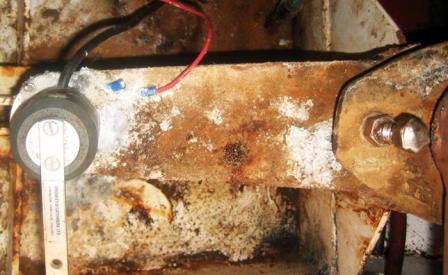
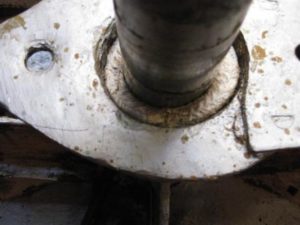
Finally the engine was in place and all engine related issues were resolved. I am ready to move to the next projects: the Yacht steering rudder. There was a constant drip (Around the rudder shaft staffing box) that caused a lot of rust. I needed to remove all of the old material and get a new kind (Teflon based) that could be tightened so no drip would occur while the friction is lowered to allow proper operation.
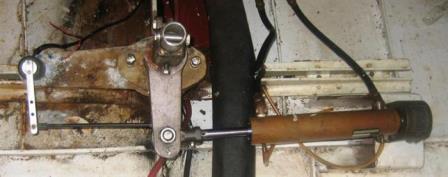
The gap that was created around the steering shaft needed to be cleaned from the old material and I had to put new kind of “Teflon” material around the steering shaft. This allows me to tighten the top cover preventing any leaks while at the same time allowing the shaft to turn and move the rudder without much resistance to the steering mechanism. The next two pictures provide more details.
Once I finished with the “Safety” related issues of broken engine brackets and leaking steering, I wanted to work on Aliza’s appearance which meant grinding all the rust spots on deck and getting her ready for exterior paint. In some areas I needed to add a filler (A mix of epoxy resin with micro balloon powder) which was needed to smooth the deck surface before painting. This was due to the fact that some rusting occurred and lifted up the original filling that Dad did at the time he built Aliza. I needed to make sure the deck is done and primed so with time I could see how well the filler and the primer that I used were working. I really needed to define what is the best way to fight rust on Aliza. I also checked a number of rust transformers (These are chemicals that work on a rusted area to “convert it back from rust to solid). Thru a friend in a sailing forum I was introduced to WR-9 made by White Chemical in Texas for the oil drill platform industry. I got a one liter bottle to try and see how it works for me. So far the results are good.


I also took a pause to learn and do some fiberglass work. My dingy had some damage in the bow and I asked the yard to let me know how much it would cost to repair it. They looked at it and gave me an estimate for $3600. (The new boat cost coated me much less.) So I informed the Mgr that I will not do the work as I could buy a new boat instead. He promptly submitted a bit for $180 estimating fee. I explained him that I was not told there would be any fee involved and that all over the world people provide estimates for their work so they can do work and they do not charge for it. He understood the point and the bill went away.

I did the job much later on my own, The cost about $100 in material and maybe 20 hours of work. (Any I was proud to say that the bow of that dingy will NEVER have a hole in it the way I repaired it.)
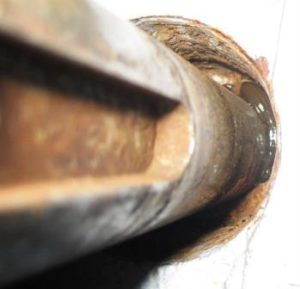
Next was the Engine drive shaft dripless which needed a new flexible sleeve (Manufacturer recommendation was a change every 6 years and we had almost 10 on ours.)
The only problem was a stuck set screw that did not allow me to remove the old SS part… After lots of broken Alan keys I was able to remove the part and get replacements from the manufacturer.


At my 3rd summer out while I really wanted to be in the water for that season, I just could not find the time to work on Aliza (I was really busy with some major projects at work).
Unfortunately, during the years the marina owner changed his business model and decided to concentrate on smaller lighter boats. He wanted Aliza out of his yard and pronto (Aliza was the biggest heaviest yacht there). So I had to get her ready for the big SLPASH (As they call the launch after a long stay on land) in a hurry. I thought I would give him some work to do for Aliza and that might change his mind and buy me some time… (I was doing all the work on my own and basically other then pay the season storage fees he did not see any more money from me. On the other side were all these smaller boats that had him do everything for them (including filling up the fuel and changing oil.)
I as ked the Mgr how much he would charge me for painting bellow the waterline (Antifouling paint) He gave me his cost and it was reasonable. I said lets go… As I could get the paint at a lower price then he could I ordered 7 gallons of the best hard antifouling I could find. (At a hefty cost of about $1200). I did most of the hard prep that was needed and all he had to do was to paint a tie coat (A special paint needed between my old ablative antifouling and the new hard antifouling.) So he does the final prep for the tie coat and puts it on. I am looking and watching like a hawk everything they do to my baby!
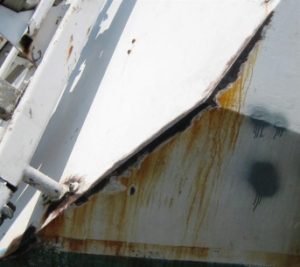
Then on a Saturday they start painting the antifouling. They started before I got there so I watched and then decided to go to the main building and talk with the head person about the progress. When I was there I asked where my paint is stored and he pointed me to the corner where I saw 7 gallons of my new hard antifouling paint! Well, if the 7 gallons are there then what is he using to paint Aliza with? I thing that was a great question at that time and rushed to Aliza to see what the answer would be. The answer was that he was using the wrong paint, an ablative paint that belonged to another boat. (And the real bad news was that he already did about a quarter of the work on Aliza.)

This is the WRONG type of bottom paint the yard used by mistake!

Wrong paint on Aliza!
I made him stop and told the Mgr we need to remove this paint and put another tie coat and only then to start with the right paint. Well the nice thing is that the head guy understood me and stopped the painter form continuing. The bad part was that next Monday morning they thought that they could just put the right paint on top of the wrong paint with out removing the wrong paint or a redoing a tie coat. That was a very costly mistake on their side. When I came and saw this I made them stop again and call the manufacturer. The Mgr came to me after an hour and said that indeed the manufacturer told them exactly what I said. They were up the proverbial Sh*& Creek and there were no pedals to be found.
So now they want to take 2 coats of paint (not really dry yet) and they can not do it with a sander as it sticks to the paper fast and ruins it. As they really want me in the water (pressure form the owner) They decide to go with a chemical base paint remover… I think they really regretted that decision. The remover took off ALL of the paint form that section including 5-6 layers of paint and primer down to (in some areas) to the bare metal.
When I saw that I was furious. I now need to put at least 2 coats of primer, a tie coat and then 3 coats of antifouling… This simple paint job was now delaying the launch and causing some major expense in time and money. I wanted to reduce their work load and save them time and money so I did the 2 primer coats by myself. I told the Mgr to prep the primer by sanding it lightly as per the recommended procedure by the manufacturer.
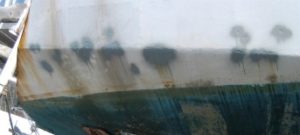
Next time I see a new tie coat on Aliza and when I inspect it the paint starts to flak off!
This became the never-ending story… Looks like they were still in a rush to get ALiza ready for launch, so they did not do a good job sanding the primer and the tie coat did not adhere as needed. Of course I needed to point it out and show them that the paint is pealing everywhere and finally they said they will re sand it and paint another tie coat. (There were many more interesting things that went wrong with this job however I think that you got the jest of it. My lesson learned is a re enforcement of my #1 rule: If you want something done right, do it yourself!
Promises, Promises…. Yes, they re sanded, no they still did not get it right. It was a nightmare, (Both to them and me) so both sides really wanted to end this thing. Final action was that they did not bill me for the fine work they did and I got a promises that if the paint will flake off they will re do the work at no cost to me. (I told the Mgr that if that paint is flaking they next time he takes off all the paint and starts from scratch doing the right job he should have done the first time.)
We finally launched Aliza without a hiccup, I stayed another day to finish putting steering oil into the system, starting the engine, testing the transmission, and then off to Haverstraw for the winter.
Soon I’ll expand on each of the projects and add pictures so you can see what I am writing about. Please let me know if you have any questions by sending me an e-mail. I’ll do my best to answer and incorporate your requests into Aliza’s website.